Printing Workflow
This page walks through a complete OpenCAL print from start to finish: preparing the print file, loading resin, running the print, and post-processing the finished part.
Warning
Resin safety — read before you begin.
Always wear nitrile gloves when handling resin or uncured (wet) parts.
Never expose the resin to natural sunlight. Sunlight (and other strong UV / blue light) causes rapid, uncontrolled curing that will ruin the resin and can solidify it in its container. Keep resin away from windows, work under subdued ambient room light, and keep vials capped whenever they are not in use.
Work in a well-ventilated area and follow the resin’s Safety Data Sheet (SDS). See Overview for full handling guidance.
Calibration
Before your first print (and any time you move the projector or optics), calibrate the machine so the projected image is focused, centered on the vial, and sized correctly. Calibration uses the tools under Settings on the LCD menu (see Controls & Operation).
Set up the projector (NexiGo Nova Mini). Once the projector is mounted in the machine, and before aligning it, configure it for printing from the projector’s own menu:
Disable auto focus so the focus does not drift during a print.
Maximize the brightness.
Note
Many of the NexiGo Nova Mini’s features have not been explored for CAL printing yet, so there may be room to increase light output and/or picture quality. See the NexiGo Nova Mini user manual for the full settings reference, and please share anything that improves prints on the Discord.
Display the calibration image. The calibration image ships on the Raspberry Pi. Open it from Settings → Calibration Images on the LCD menu.
The projector alignment image.
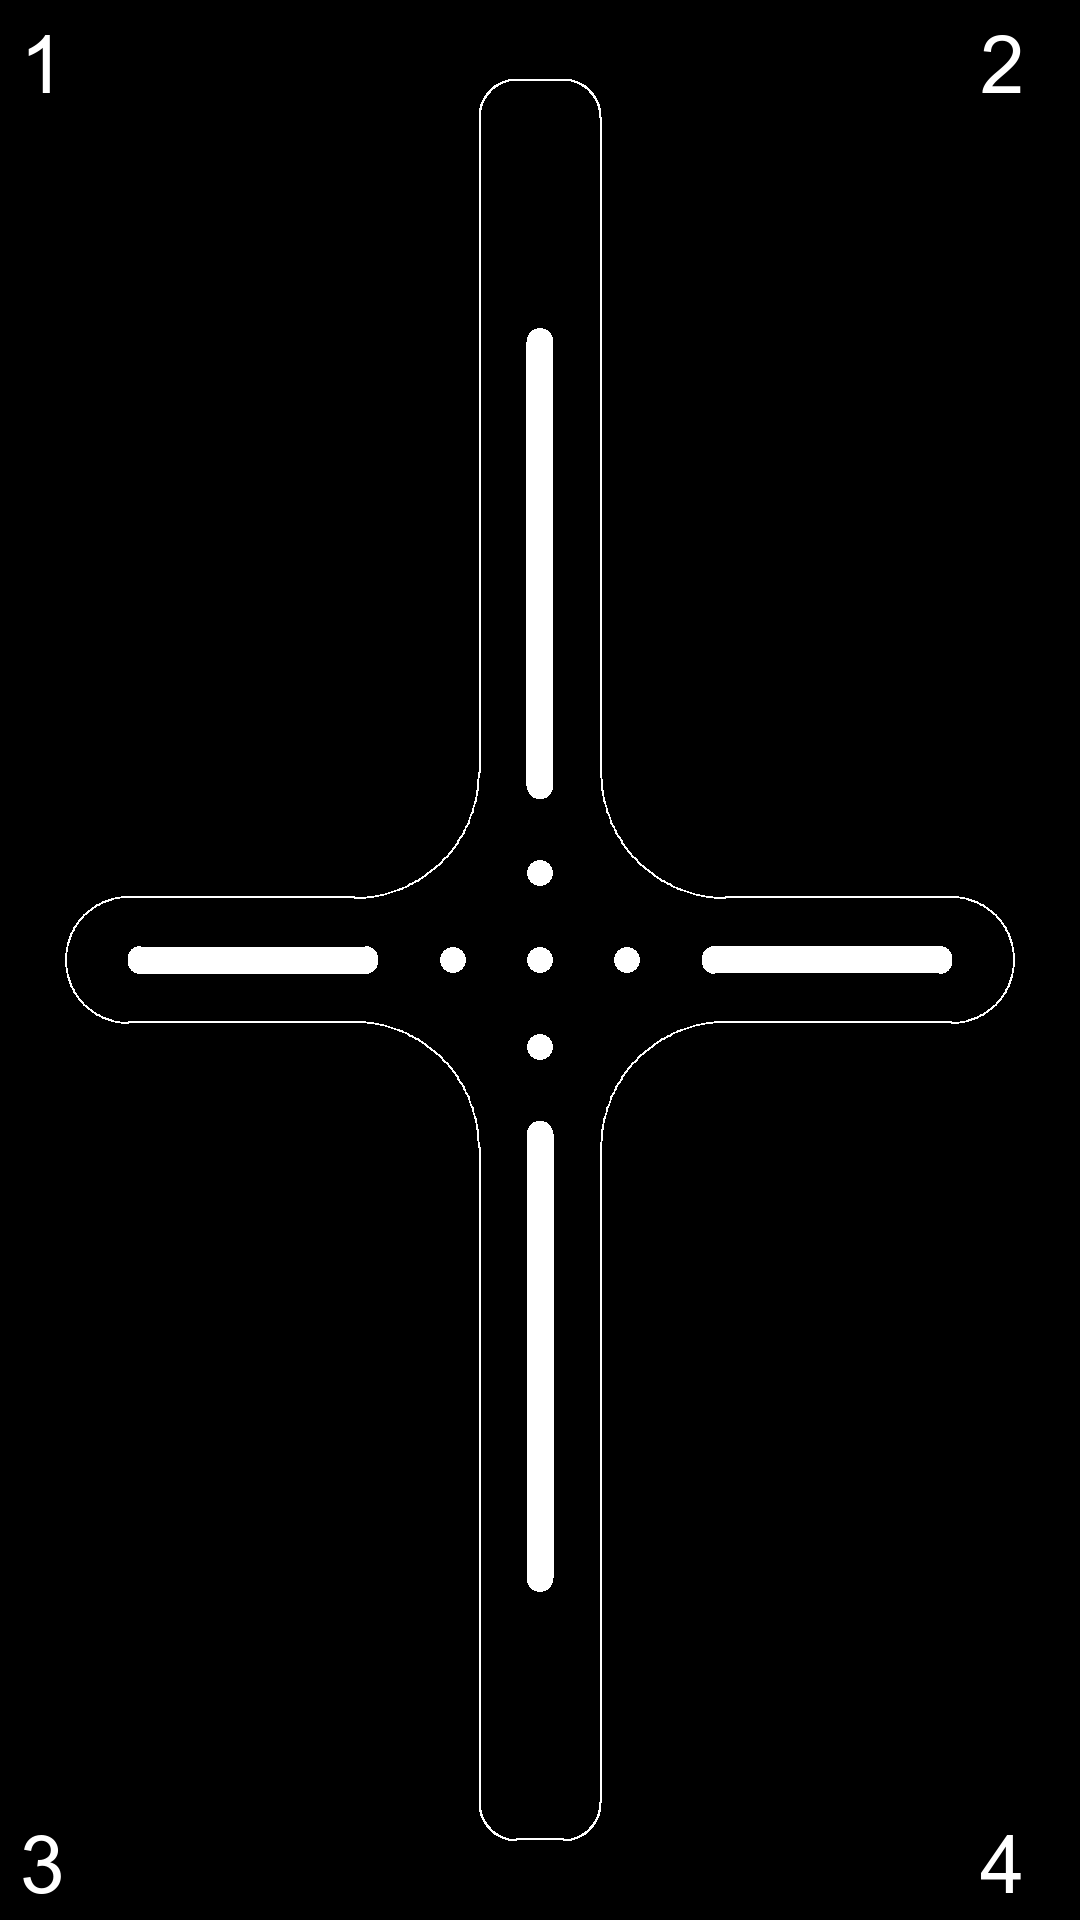
Keystone, focus, and align the projector. Place the cross-strut alignment tool in the machine (in place of the vial). Keystone the projected image so it is square and undistorted on the tool, then adjust the projector so the calibration image is sharp and centered. Use Settings → Show Alignment to project the cross-strut alignment image, and adjust the projector’s XY stage until the projected cross lines up with the tool’s cross-struts. Rotate the encoder to shift the image up or down for transverse alignment.
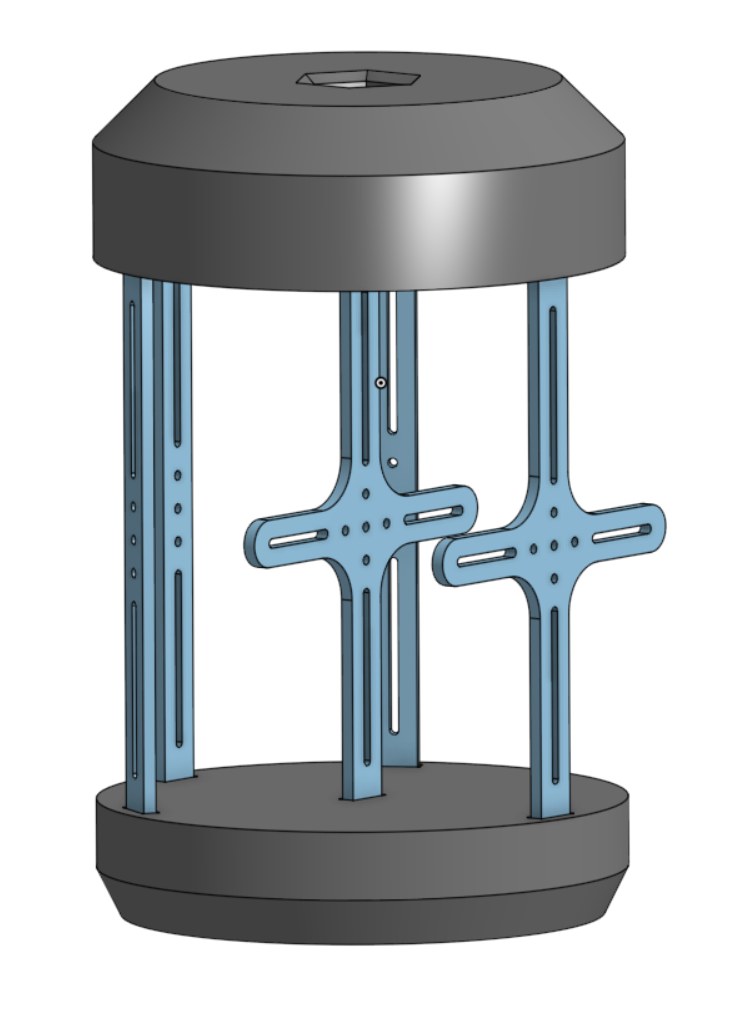
The cross-strut alignment tool.
All the files needed to build the alignment tool are on the OpenCAL Printables page.
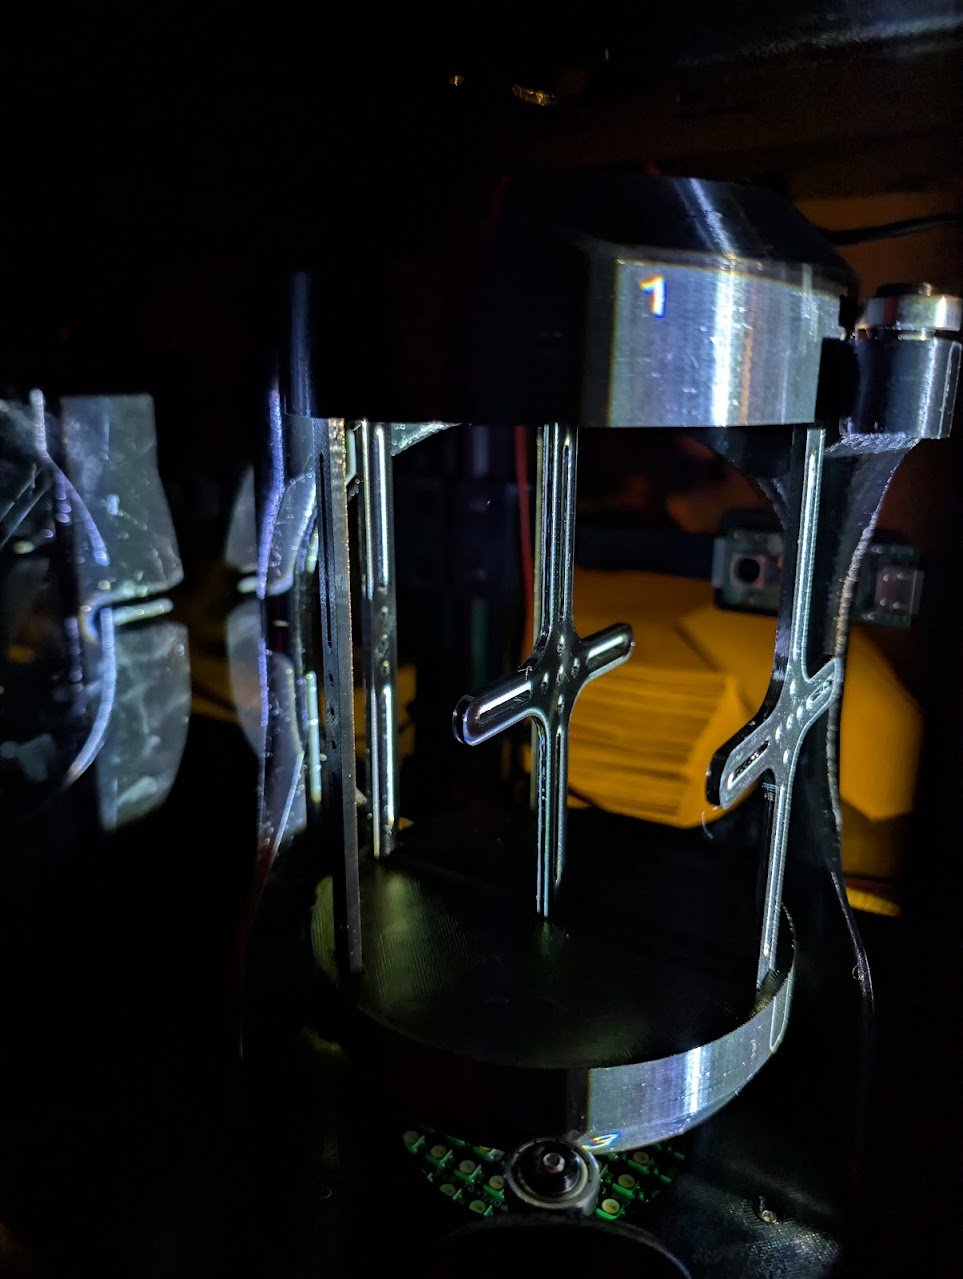
The alignment image projected onto the alignment tool.
Find the pixel size (Find Vial Width). OpenCAL needs to know the pixel size — the physical width each projector pixel covers at the vial — so that Tomo can scale your model correctly. Select Settings → Find Vial Width on the LCD menu. It projects a white rectangle (a vertical bar of light) onto the vial, and rotating the encoder grows or shrinks its width while the OLED reports that width in pixels. Widen the bar until its edges sit just barely at the edges of the vial, then dial back one notch so the bar is a hair inside the glass, and read the pixel value off the OLED. Combine it with the vial’s known inner diameter to get the pixel size:
pixel size = vial inner diameter ÷ width in pixels
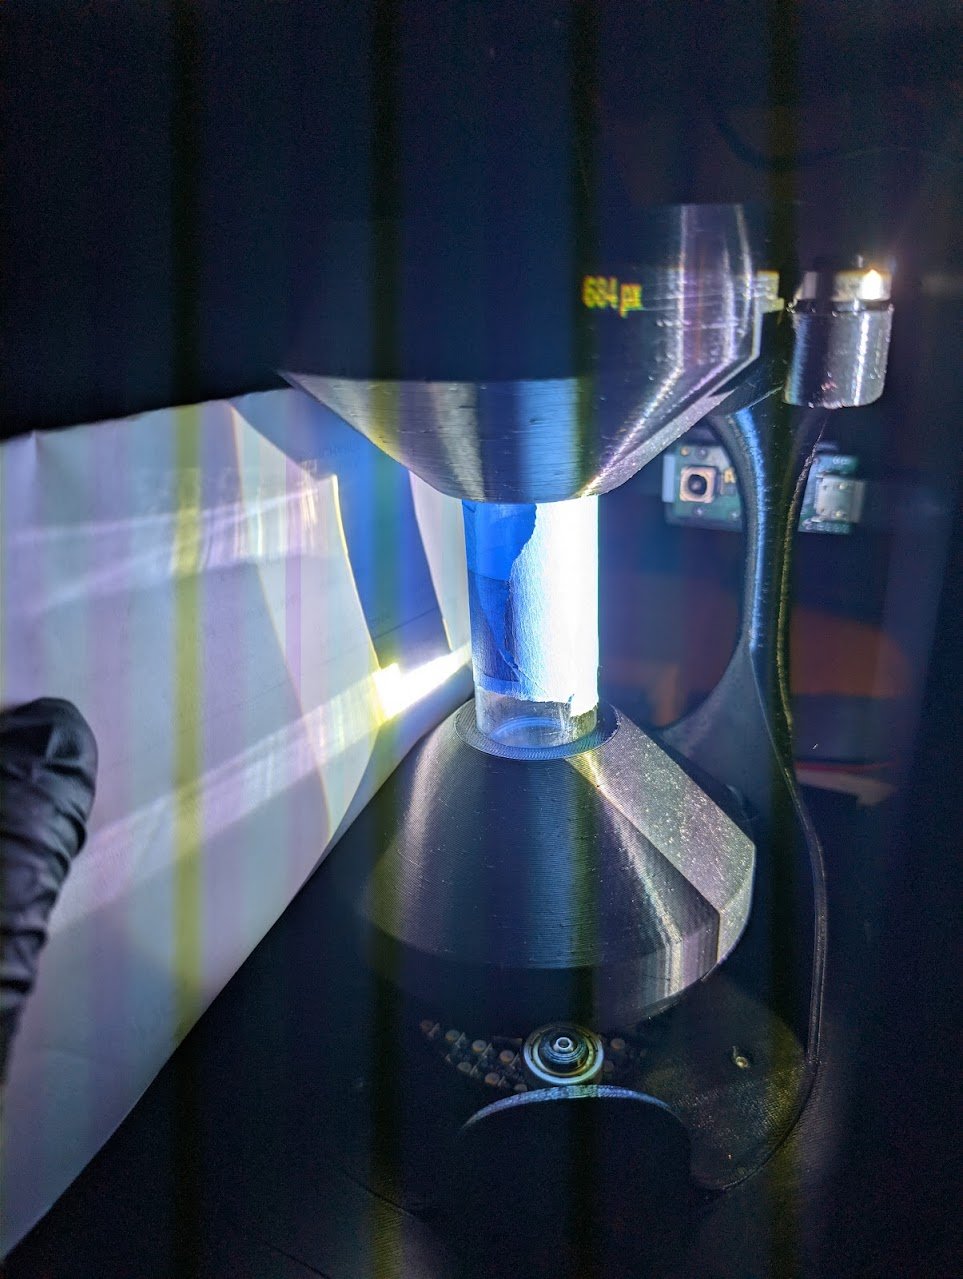
Correct: the bar of light fills the vial right to its edges. Read the pixel value here (684 px in this example), after backing off one notch. Note the strip of tape on the vial.
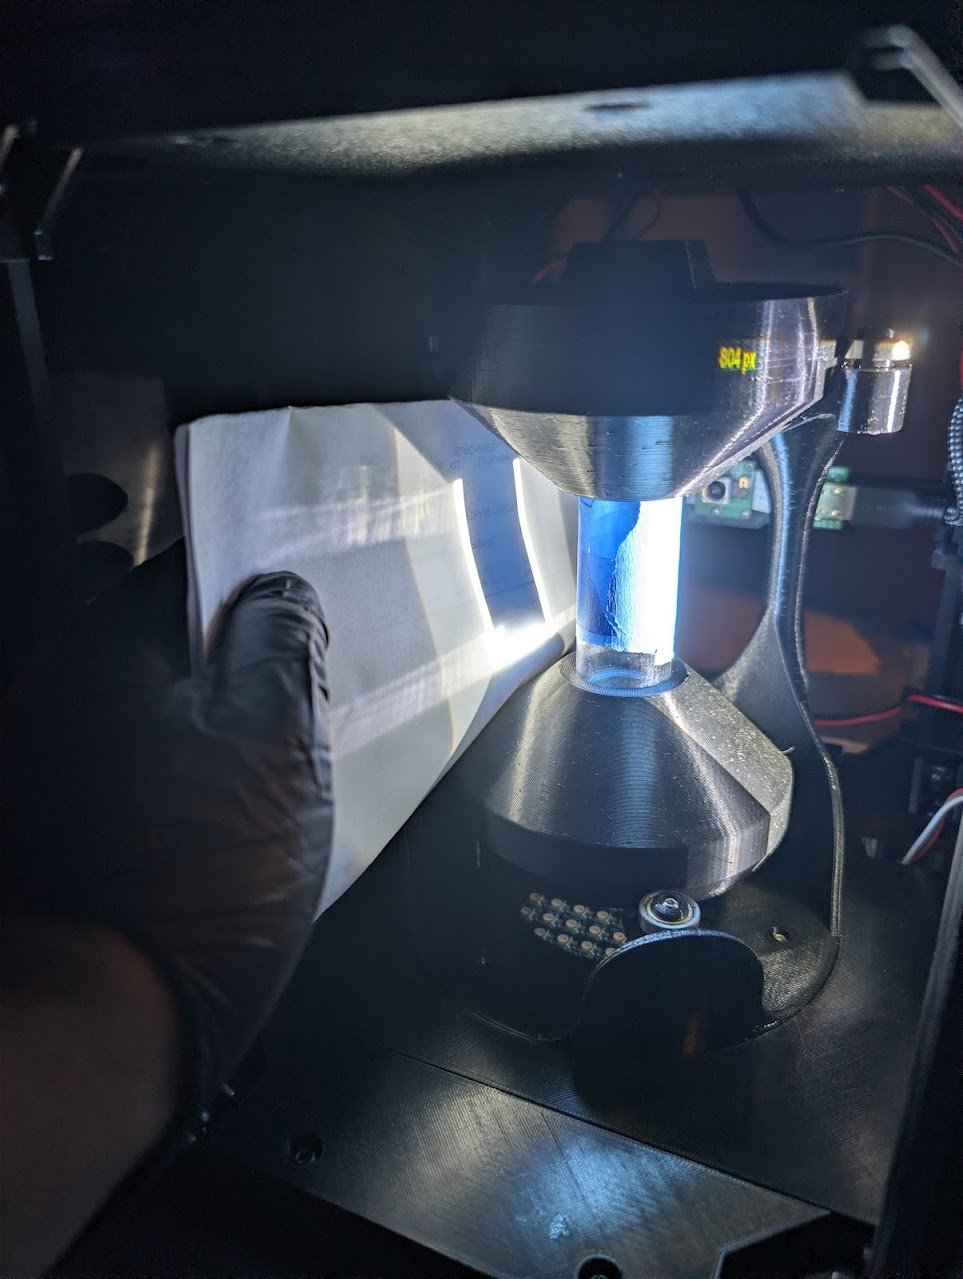
Too wide: the bar has grown past the vial edges, so the reported value (804 px) is too high.
Tip
Wrapping a strip of tape around the vial makes the boundary much easier to see — it blocks stray light so the edge between lit and unlit is sharp.
Find Vial Width also doubles as an alignment check: when the projector is centred on the vial, the bar of light should be even on both sides. Uneven brightness means the projector is off-centre, so re-centre it and re-check.
Note
Calibration only needs to be repeated when the projector or optics are moved.
Step 1 — Prepare the Print File
Generate the projection video for your part using Tomo (or
VAMToolbox directly). Export it as an .mp4 and name it with
the OpenCAL convention so the printer reads the rotation speed automatically:
<part_name>_<rpm>rpm.mp4
Then copy the .mp4 onto a USB drive. (See Video File Naming Convention for details.)
Step 2 — Load the File onto the Machine
Insert the USB drive into the Raspberry Pi.
On the LCD menu, select Print from USB and choose your file (see Controls & Operation).
Confirm the RPM when prompted.
Step 3 — Prepare and Load the Vial
Warning
Put on nitrile gloves and keep the resin away from sunlight before opening any container.
Fill a clean glass vial with the photopolymer resin. Pour the resin gently down the side of the vial so it does not fold in on itself and trap bubbles.

Filling the vial. Pour against the side to avoid bubbles.
Cap the vial securely to prevent spills and to limit light and oxygen exposure.
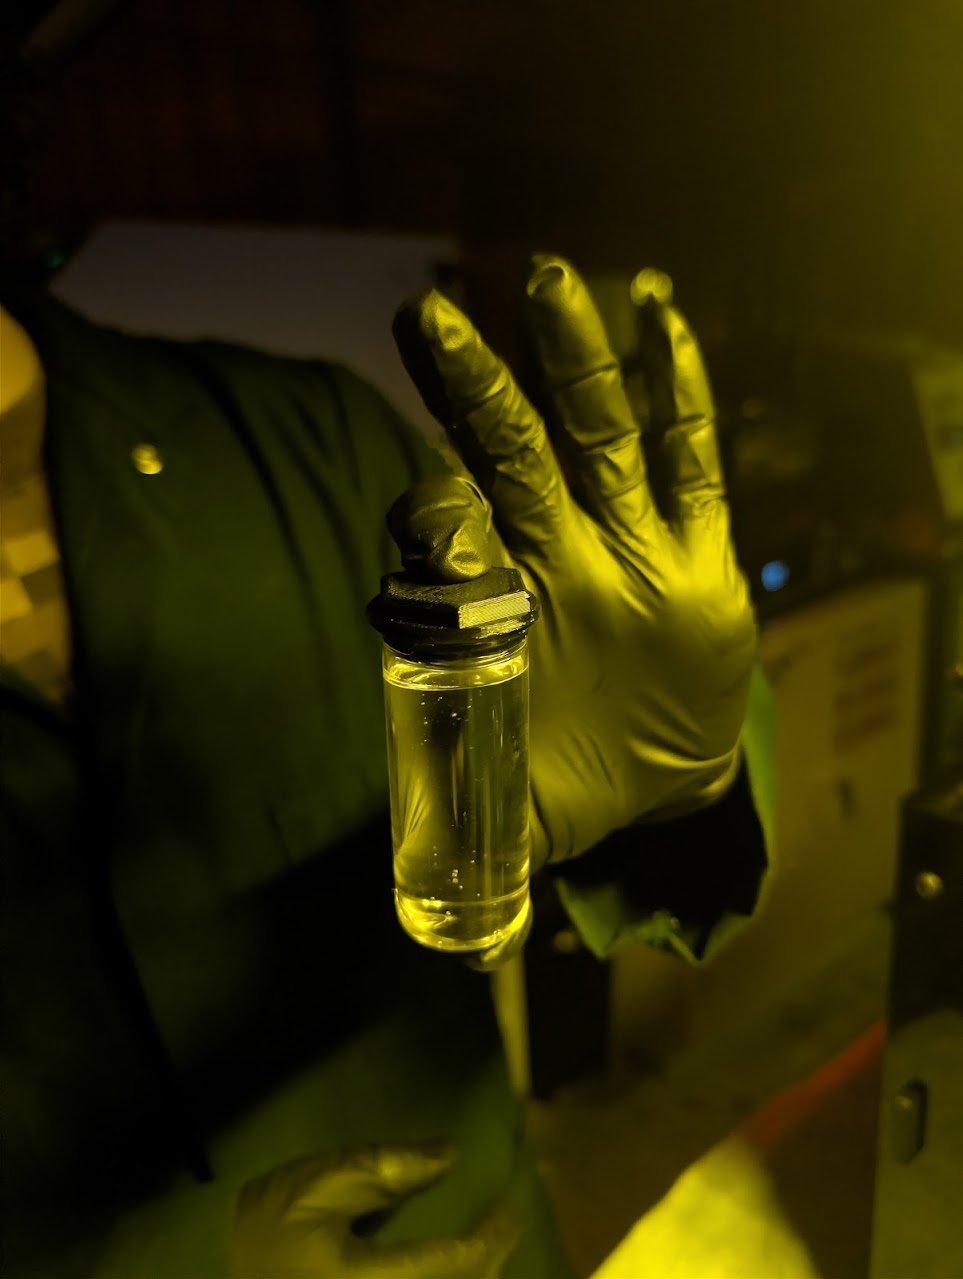
The capped vial.
Place the capped vial into the machine’s rotation stage: seat it on the bottom rotation piece, attach the top piece, and make sure it is centered and secure.
The vial seated on the bottom rotation piece.
The top piece attached.
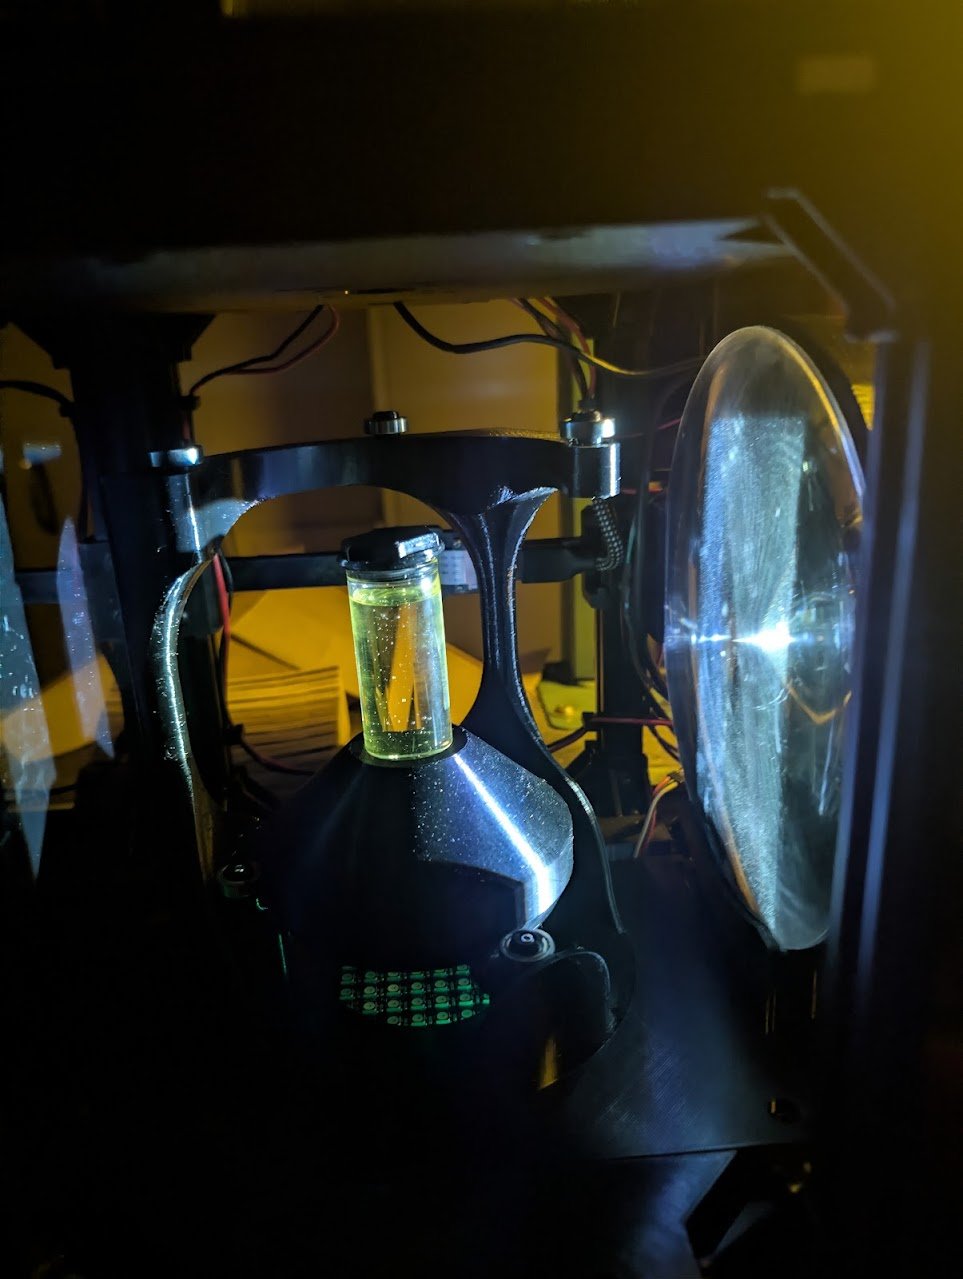
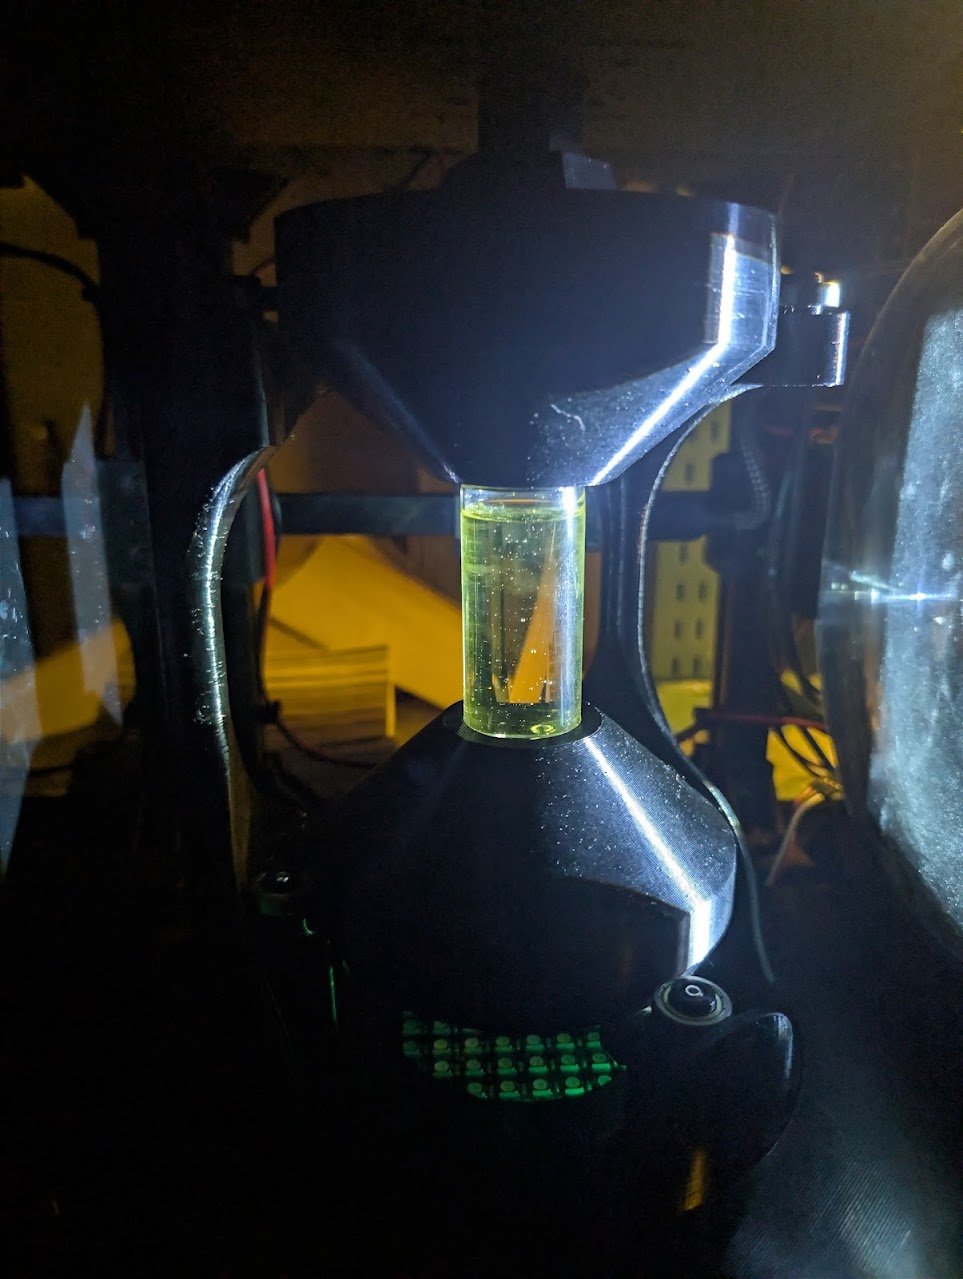
Step 4 — Run the Print
Start the print from the Print from USB menu. The vial rotates while the projector plays the video, and the part forms volumetrically over the rotation(s). You can monitor progress on the camera view, and click to stop when the print finishes.
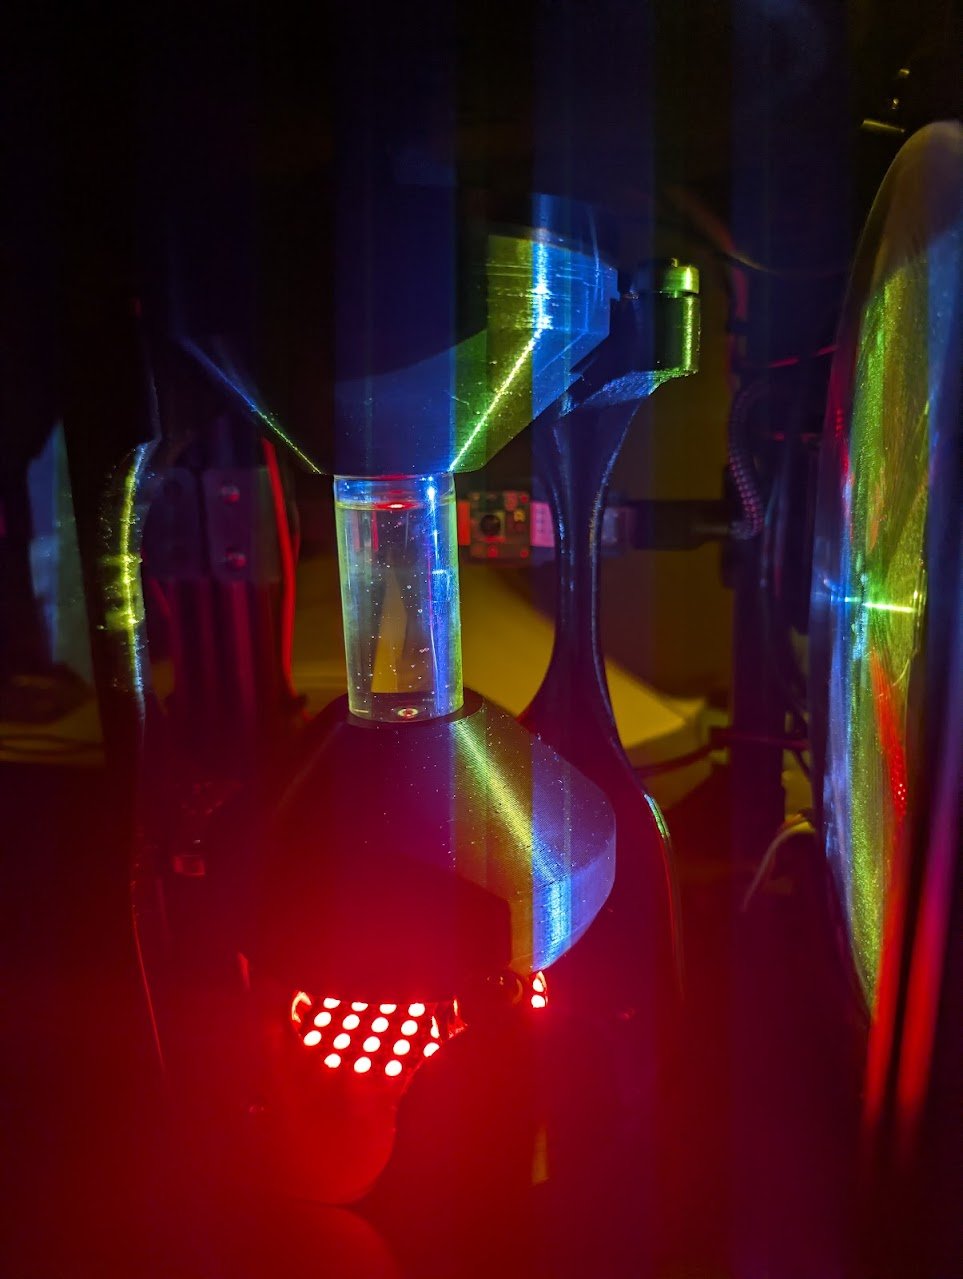
A print in progress: the projector plays the video into the spinning vial.
Step 5 — Remove the Part
When the print is complete, remove the vial from the machine.
Wearing gloves, uncap the vial and use tweezers to gently lift the cured part out of the surrounding uncured resin.
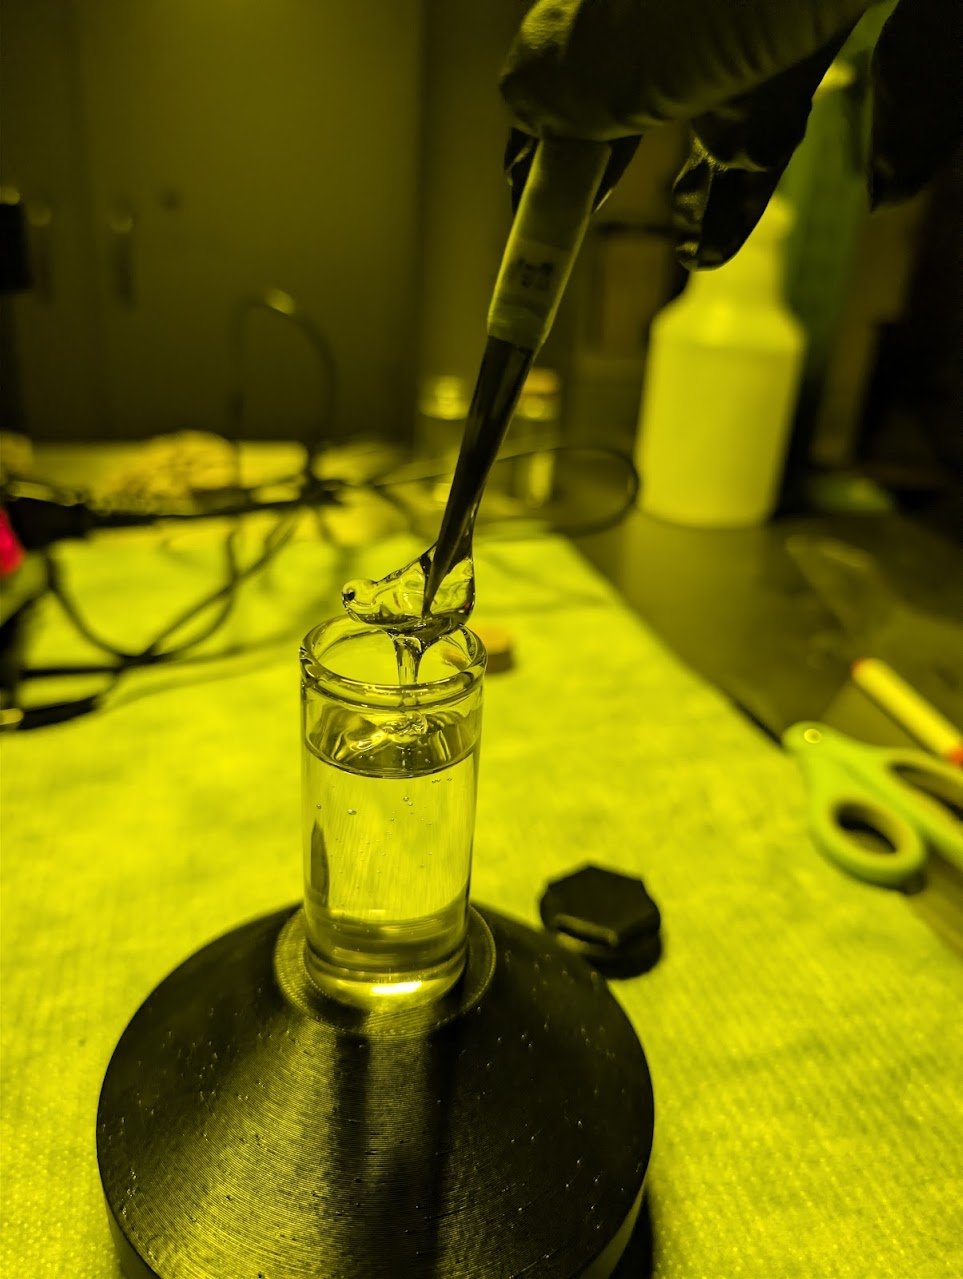
Lifting the cured part out with tweezers.
Let excess resin drip back into the vial; the remaining uncured resin can be reused (see Step 8). Let gravity do the work: holding the part and letting the resin drip off is the best way to clean off the excess.
Step 6 — Wash (Post-Process)
Wash the uncured resin off the part using a Formlabs Form Wash (or an equivalent solvent wash). Use the solvent appropriate to your resin, commonly isopropyl alcohol (IPA), and follow the wash time recommended for your resin.
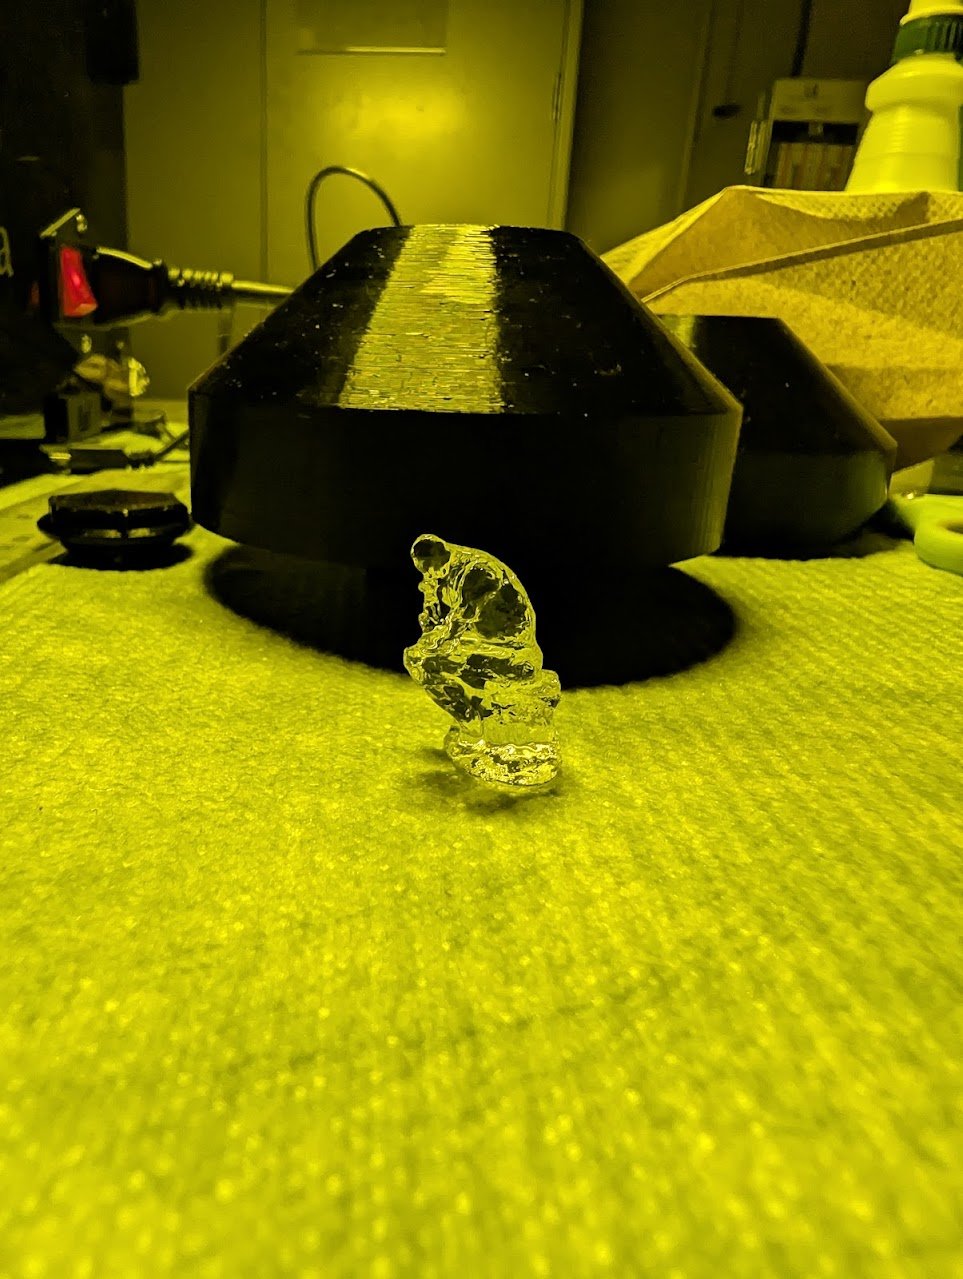
The part after washing in IPA.
Step 7 — Post-Cure
Post-cure the washed part in a Formlabs Form Cure, with the part submerged in water (or under vacuum). Curing in water or under vacuum excludes oxygen, which would otherwise inhibit surface curing and leave the part tacky.
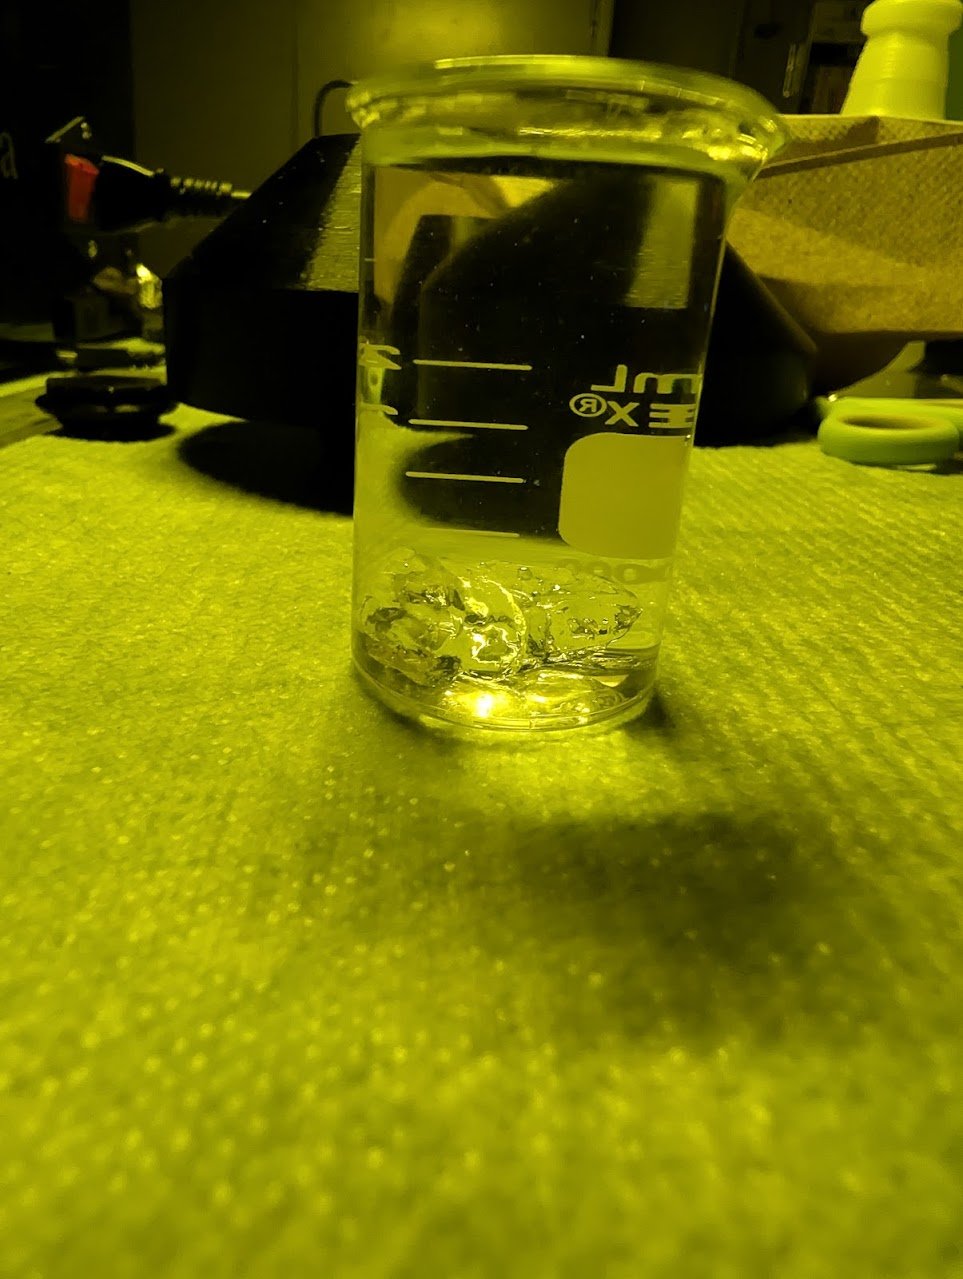
The washed part submerged in water, ready to post-cure.
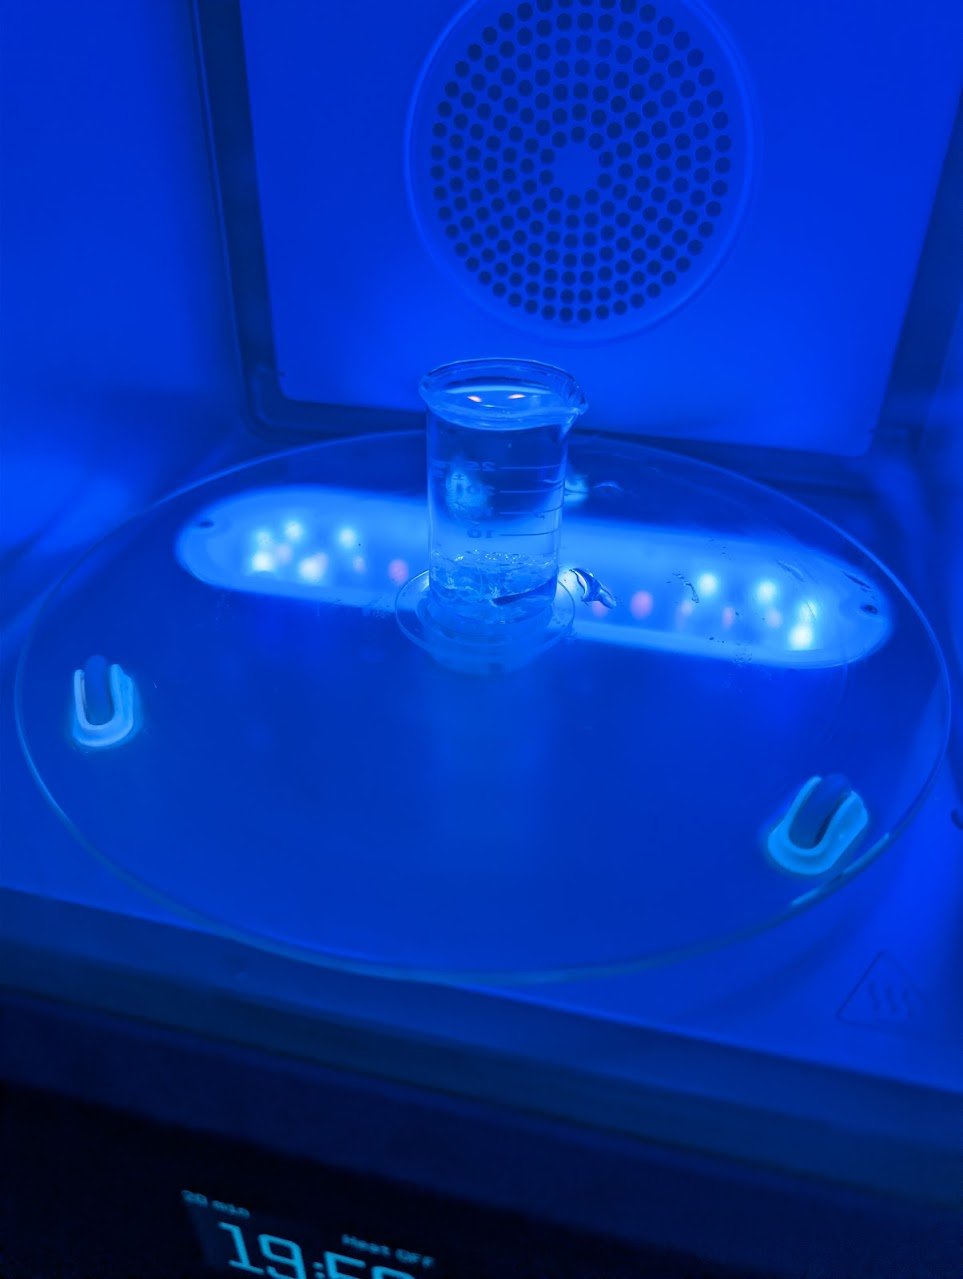
Post-curing in the Form Cure.
Step 8 — Rest Before Reuse
Let any resin you plan to reuse sit for about 24 hours before the next print. Curing in CAL depends on oxygen inhibition (dissolved oxygen suppresses curing until enough light dose overcomes it), and a print consumes the resin’s dissolved oxygen and stirs it up. Resting the resin lets it resettle and re-equilibrate its oxygen so the next print behaves consistently. For how resin reuse was characterized in practice, see the Automatic Exposure paper in Research Papers.