Help Wanted
This page collects parts of OpenCAL that we started but did not finish: features and add-ons that are not yet fully working. We would love the community’s help to complete them.
Have experience, ideas, or want to take one of these on? Reach out on the OpenCAL Discord; contributions are very welcome.
Cheaper Motor Controller (TMC5160T)
To lower the build cost, we wanted to drive the stepper motor with a cheaper controller than the Pololu Tic T249 used in the current build. We tried the TMC5160T as a candidate:
We could not get it working reliably, so it never made it into the official build. If you can get the TMC5160T (or another low-cost driver) running dependably with OpenCAL, we’d love your help.
Large Vial (Screw-On)
We designed a large, screw-on glass vial to print bigger parts, but we could not get it fully working and reliable. For now, use the small vial — or the simpler lid-style large vial documented in the Rotational Element guide — for printing. If you’d like to help finish the screw-on design, we’d welcome it.
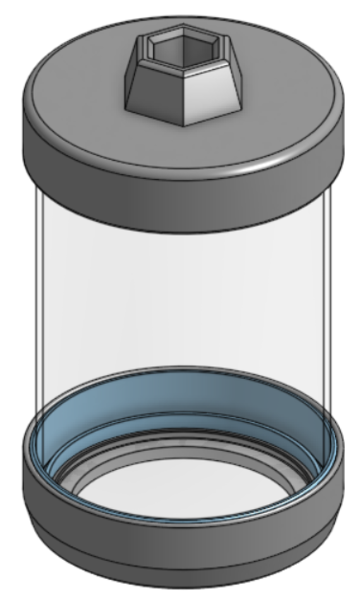
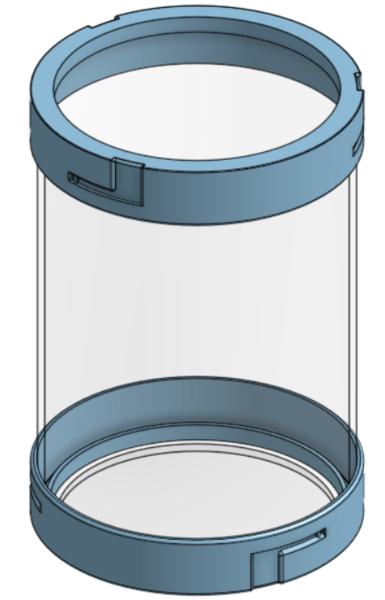
Parts:
(QTY 1) Large Glass Vial
(QTY 1) Bottom Glass Vial Attachment
(QTY 1) Bottom Vial Lock
(QTY 1) Top Glass Vial Attachment
(QTY 1) Top Vial Lock
(QTY 1) Bottom Glass Disk
(QTY 2) 1/8’’ Soft Silicone O-Ring
(QTY 1) Silicone Caulk
Tools: Tape
We never finalized the screw-on assembly, so step-by-step instructions are not documented — the parts and CAD above are the design as far as we took it.
Vial Light-Protection Covers
Photopolymer resin cures on exposure to stray light (see the resin-handling warnings in the Materials overview). We started designing covers for the vials to shield them from ambient and stray light when they are not being printed (protecting the resin between prints and during storage), but we never settled on a reliable, easy-to-use design. Ideas and designs from the community are welcome.
Centrifugal Spinning (CentrifuCAL)
We explored a centrifugal spinning add-on, CentrifuCAL, to counteract sinking or floating of the part in low-viscosity resin. It is a hand-cranked, planetary-gear spinner that holds and rotates the vial.
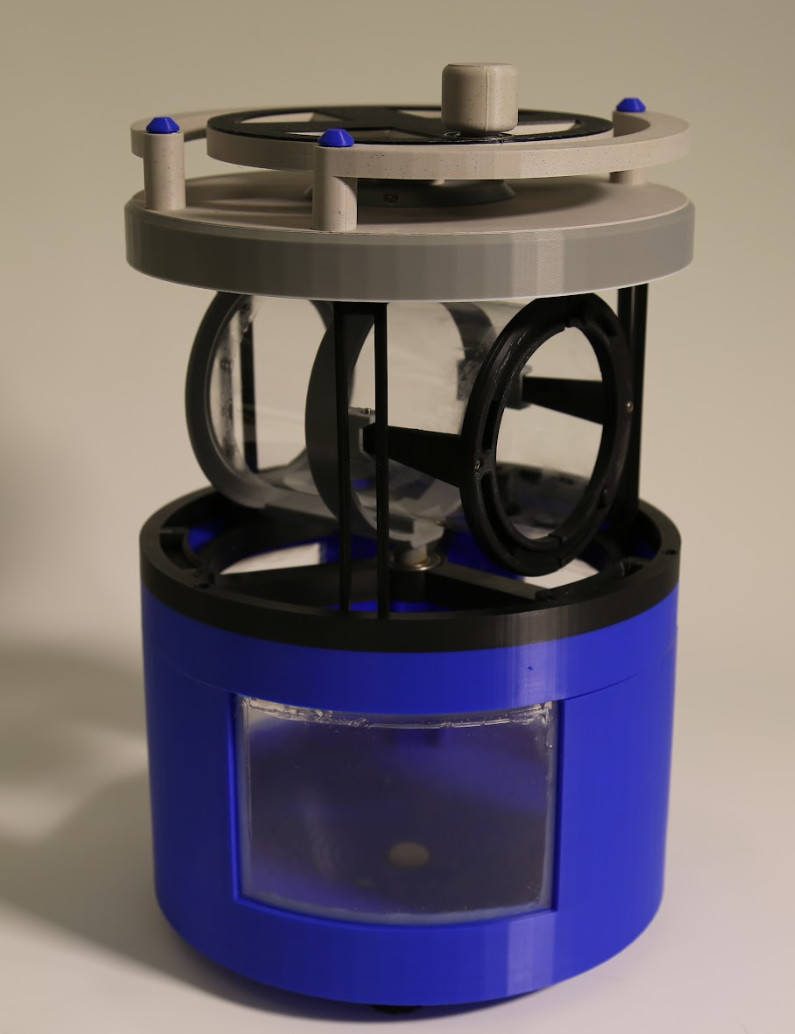
An early CentrifuCAL prototype.
We built the early prototype shown above but did not fully finish or validate the design, so it is not part of the official build. Its parts and assembly steps are recorded below to help anyone who wants to pick it up.
Tip
Off-the-shelf alternative. If you don’t want to build the CentrifuCAL spinner, a manual salad spinner can provide a simple, low-cost way to spin the vial, such as this salad spinner.
Note
The steps below describe an early prototype. Step images are not yet included; they will be added as the design is finalized.
Tools
Soldering iron (for heat-set inserts)
3D printer — PETG capable, minimum bed size 256 × 256 mm (prototype printed on a Prusa)
3 mm hex key
Superglue
Scissors / box cutter
Parts
3D-printed parts (each links to its Onshape model; print quantity in parentheses):
Lower Base (3 parts)
Upper Base (3 parts)
Lid (3 parts)
Planet Gear (×3)
Handle (×2)
Handle Cap (×4)
Foot (×4)
Other materials:
2 × polycarbonate sheets, cut to 145 × 135 mm
28 mm bearing
M3 heat-set inserts
M3 bolts: M3×6, M3×10, M3×25, M3×40, M3×50
(See the BOM for quantities and sourcing.)
Assembly (prototype)
3D print all parts.
Cut 2 polycarbonate sheets to 145 × 135 mm.
Place the polycarbonate sheets into their respective slots in the Lower Base.
Using the soldering iron, place 3× M3 heat-set inserts into the holes on the top of the Lower Base.
Place the remaining M3 heat-set inserts: 7 on the Lid and 4 on the Upper Base.
Assemble the Lower and Upper Base in thirds, placing the Upper Base onto the polycarbonate sheets and fastening with an M3×40 bolt.
Fasten the three pieces of the Lower Base, Upper Base, and Lid together with superglue.
Place the final 3× M3 heat-set inserts into the holes on the Door.
On the Lower Base, press-fit a 28 mm bearing into the middle section.
Superglue the Vial Holder to the Spinner.
Secure the Tab to the Vial Holder with an M3×6 bolt.
Place the Vial Holder and Spinner onto the bearing in the Lower Base.
Affix the Lid and handles with 4× M3×50 bolts.
Affix the Ring Gear with 4× M3×25 bolts.
Assemble the remaining gears (3 planet gears + 1 sun gear), passing the Sun Gear through the hole and fastening it into the slot on the Vial Holder.
Assemble the gearbox: stack the Gearbox Bottom, Cover, and Top; flip it over and drive 3× M3×10 bolts into the holes.
Place the assembled gearbox on top of the gears, fitting its pegs into each planet gear.
Secure the gearbox to the Lid with 4× M3×25 bolts.
Superglue the 4 feet to the bottom of the assembly.
Place the handles on top of the box and secure with 4× M3×50 bolts.
Place the handle caps on the handles and secure with superglue.